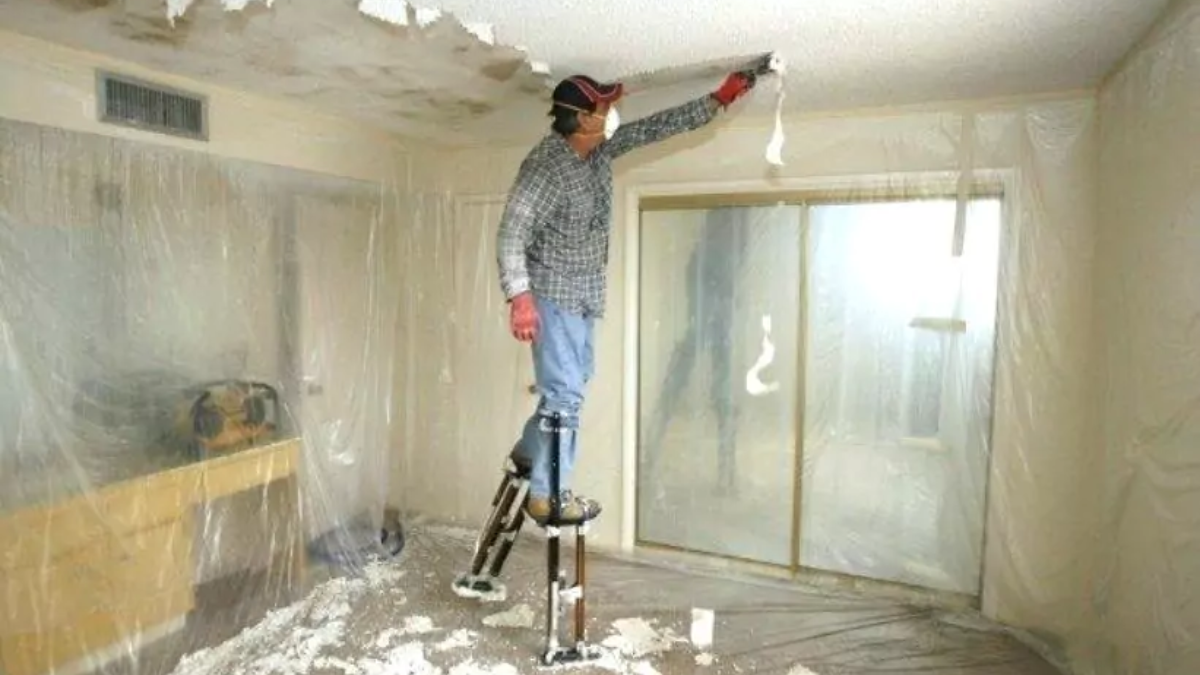
A Guide For Removing Popcorn Ceiling (2023)
Understanding how to remove a popcorn ceiling safely can save you time and money. While removal is not typically tricky, certain factors can complicate the job. Being aware of these factors is essential to avoid potential issues and complete the job successfully.
Removing popcorn ceilings can be daunting, especially if they contain asbestos. But, if you’re lucky not to have asbestos in your popcorn ceiling, removing it is pretty simple. Let’s look at how you can efficiently and quickly remove popcorn ceilings.
How to Remove Popcorn Ceiling: A Step-by-Step Guide
1. Asbestos Testing: Ensuring Safe Environments
Before removing a popcorn ceiling, it is essential to ensure it does not contain asbestos. If the roof was installed before asbestos was banned in construction work, it might still have harmful material. Therefore, testing for asbestos before proceeding with the removal process is crucial. However, taking precautions while trying for asbestos is essential to avoid inhaling any of the material.
Undertaking asbestos testing by yourself is not advisable. Even though you can buy a DIY asbestos testing kit for personal use, the reliability of its outcomes may differ from one product to another. Moreover, it requires you to manage the sample, which can be hazardous.
To ensure your safety, it’s essential to have your ceiling tested for asbestos. Begin searching for a lab near you that performs asbestos testing. Check with them to determine the cost of analyzing a sample. Once you have the information, put on protective gear, including a mask, and carefully extract a small amount of material from your ceiling. Remember that getting the test results may take some time, so it’s best to act sooner rather than later.
It is essential to seek the assistance of a professional removal service if your ceiling has asbestos. Removing it yourself can be dangerous and should be avoided at all costs.
2. Providing Room Protection with Covering
Before removing the popcorn ceiling, taking the necessary precautions to avoid a mess is crucial. The first step is to ensure that the room is adequately covered to prevent the fine dust from spreading everywhere. This dust can easily make its way through even the tiniest of openings. Therefore, it’s essential to double-check that your covers can isolate everything, leaving no gaps exposed. Once you scrape out the old popcorn ceiling, it will inevitably fly everywhere. So, taking all the necessary precautions to keep the workspace as clean and tidy as possible is crucial.
Taking particular care of your electronics during the moving process is essential. To avoid any damage, it’s best to remove them from the room if possible. Dust can accumulate inside your computer, leading to decreased performance over time. So, handling your electronics with care is crucial during the move.
To ensure that your covers stay in place and don’t become loose during removal, it’s essential to bind them with tape securely. This will be particularly crucial as you move around the room to avoid accidentally dragging any of the plastic sheets.
3. Thoroughly Wetting the Ceiling Surface
Once you have completed the necessary preparations, the next step is to dampen the popcorn ceiling so that you can start removing it. This can be done simply by using water from a spray bottle. It is essential to ensure that the surface is thoroughly soaked, taking care not to cause any damage to the ceiling or anything that may be above or below it. We will discuss this in more detail below.
If you want to remove a popcorn ceiling, it’s essential to know that the wetter it is, the easier it will be to take down. To make the process smoother, try working in small sections to prevent the ceiling from drying out too quickly.
When working on your ceiling, it’s essential to consider the material and potential water damage. If the material is easily damaged by water, it’s best to work in smaller patches and avoid using excessive water. Spraying the entire ceiling beforehand can cause damage to materials such as wood, sheetrock, and more. Take precautions and work on your roof gradually to avoid any damage.
4. Removing Popcorn Ceiling: A Step-by-Step Guide
When removing a popcorn ceiling, the first step is to ensure the area is wet. This will make the process easier and less messy. To remove the popcorn ceiling, use a spackle knife and maintain a safe distance from the area you’re scraping to prevent any debris from falling on you. Even if you’re wearing protective gear, it’s still a good idea to be cautious and make the cleanup process more accessible.
When removing a popcorn ceiling, it’s important to remember that sometimes, a little force may be necessary. However, protecting the surface beneath it is crucial to avoid any damage. If minor scratches do occur, they typically won’t be an issue since the ceiling will be painted over or covered. However, if the top becomes damaged, it may be necessary to repair it before any cosmetic updates can be made.
5 Tips for Sanding Down Uneven Areas
To ensure that the popcorn ceiling is removed correctly, the next step is to review the entire surface with sandpaper carefully. This will help to smooth out any areas that are uneven or rough. While a sander can be used for this task, it may not be necessary, and regular sandpaper can do a great job as long as enough pressure is applied. So, take your time and work diligently to achieve the desired result.
When preparing to paint a ceiling, it is crucial to be diligent and meticulous. This will ensure that the painting job goes smoothly and the final result looks professional. Sanding the top before painting may seem unnecessary, but it is highly recommended as it provides a smooth surface for the paint to adhere to. A primer layer is also essential for protection and will make the painting process much more manageable. Even if you plan to cover the entire ceiling, taking these precautions will result in a better-finished product.
Tips for Priming and Painting a Bare Ceiling
Once the ceiling has been thoroughly cleaned and sanded, it’s time to proceed to the priming and painting stage. Begin by applying a standard primer to the surface, allowing it to dry for several hours before proceeding. From there, you can begin painting the ceiling in your desired colour. Be sure to keep all protective coverings in place throughout this process.
Cleaning out all the dust between sanding and painting your ceiling is crucial. You don’t want the dust to stick to the fresh paint and ruin your hard work. Besides, there will be a lot of dust flying around the room when you’re done scraping, so it’s best to get rid of it beforehand. If you skip this step, you may have to redo the entire paint job, which would be frustrating and time-consuming.
Tools Needed to Remove Popcorn Ceiling
Before beginning the task, it’s essential to gather a few tools that will come in handy. This step is vital to avoid any delays during the process.
Here are the following items without any particular order:
Expanding your collection of tools by investing in a larger spackle knife can potentially speed up the process, but it is not necessary. Regarding protective covers, choosing a size that is roughly twice the area of the room you plan to clear out is recommended. This will enable you to easily drape the covers over your furniture without exposing anything.
How to Remove Popcorn Ceiling: The Bottom Line
Taking down a popcorn ceiling is a task that can be accomplished with minimal difficulty. You don’t need to invest in pricey equipment or materials to complete the job, and it is a feasible undertaking for most individuals with their resources. The only situation where it is not recommended to remove the popcorn ceiling yourself is if it contains asbestos. In such a case, working with a professional service specializing in asbestos removal is crucial to ensure the task is completed safely.
Also Read:


